Starlink travel case

click to enlarge

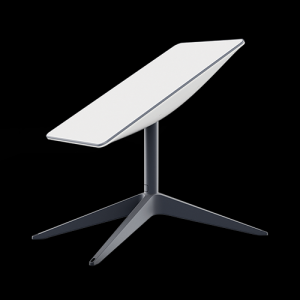
I was fascinated to see that there is a very active aftermarket for travel cases for Starlink systems.  A typical aftermarket travel case for a Starlink system is nothing more than an enormous Pelican case with suitable foam inserts.  The Starlink company itself, however, has made available a purpose-built travel case for the rectangular-antenna Starlink system.  The travel case is well suited to its purpose, as I will discuss.  Continue reading “Starlink travel case”

Bypass mode! First impressions …

Well, loyal readers, the ethernet adapter finally arrived, more than a month after I ordered it.  Here are the first impressions.

The first thing that one realizes is that the ethernet adapter is basically air.  Most of the housing of the adapter is the large receptacle opening and housing that receives the big plug that previously plugged into the router.

Another thing to realize is that you could sort of “plug the adapter into itself”.  You could take the plug of the adapter and plug it into the receptacle opening of the adapter.  This would not accomplish anything at all, but it serves as a reminder that the plug and receptacle are made so that they could mate with each other.

So what you do next, of course, is go to the router and unplug the antenna cable from the router and plug it into this adapter.  So far so good.  And then you take the plug of the adapter and plug it into the receptacle opening of the router.  So far so good.

Now what?  Well, if you want, you can plug a computer or a router or an ethernet switch into the ethernet port on the ethernet adapter.  You will then be able to pick up dozens of IP addresses in the subnet 192.168.1.x.  This is from the DHCP server and NAT server in the Starlink router.  Oh, and you can get IPv6 addresses from the Starlink router.  As far as I can see, IPv6 is enabled by default.  No way to turn off IPv6 as far as I can tell.  Not that there’s anything wrong with that!

And yes if you open a web browser and point it to 192.168.100.1, you can get to the management web page of the router.

And no, there are no LEDs anywhere on this ethernet adapter.  You are on your own to try to guess whether you do or do not have an ethernet link.  You are on your own to try to guess whether it is 10 megs or 100 megs or 1000 megs.  You are on your own to try to guess whether it is half duplex or full duplex.  I went and looked at the device at my end of the ethernet cable and it reported that the ethernet link is 1000 megs (gigabit) and it is full duplex.  I guess we would sort of hope that the port on the Starlink adapter would support full duplex gigabit, and indeed that is what we are able to get.  I imagine it will also auto-negotiate slower speeds if it is forced to do so.

All right so now we decide to jump off the cliff.  We go into the smart phone app and we open up the user interface and we slide the little slider to turn on bypass mode.  The app sort of says “are you sure?”  The app sort of explains that once you do this, the only way you can get back out of bypass mode is by physically going to where the router is and by doing physical things at the physical router.  In other words, you cannot get back out of bypass mode by any online manipulations.  (What you do is power-cycle it three times quickly.)  So anyway I click “yes I am sure” or words to that effect, and next thing you know, I find that I am in bypass mode.

On a practical level, what is bypass mode?

  • One thing is, the two wifi access points are turned off.  This means the 2.4 gigahertz access point is off, and the 5 gigahertz access point is off.  From my own point of view this is extremely good news since I prefer to use my own wifi access points.
  • The next thing is, the built-in NAT of the Starlink router is no longer part of the network.

Now what you could say is that the DHCP server is no longer part of the network, but in a way that is not quite a correct characterization.  The thing is that you still obtain an IP address by means of DHCP.  It is just that you only obtain one IP address.  I guess that means one IPv4 IP address, and one IPv6 IP address (assuming you have a dual stack turned on in your DHCP client).

Now of course what you wish is that you would get a routable IPv4 IP address.  But that is not what happened for me.  What I received was an IP address in the range of 100.77.n.n.    In other words, it is a NAT address.  Yes, I know, “carrier grade NAT”.  I sort of can’t believe that “carrier grade NAT” actually means anything other than “NAT that is provided by your carrier”.  I don’t think of this NAT as being any more friendly to you than the NAT that happens in the cheapo router that you might buy at Wal-mart.  No matter what NAT you have, it means there are all sorts of things that you wish you could do and you are not able to do.

It is also true that the DHCP server that is somewhere on the Starlink side of that ethernet port serves up an IPv6 prefix.  This IPv6 prefix makes it possible for your own router to hand out fully routable IPv6 IP addresses to hundreds or probably thousands of devices on your LAN.

I did then set up a static route in my router and yes, I was once again able to get into the router user management page at 192.168.100.1 using my ordinary web browser.  So for example I am able to view the obstructions display.

My first few measures of latency and jitter, using pure ethernet connections (no wifi anywhere in the connections), were very consistent with what I had been getting before, in non-bypass mode.  Saying this differently, being in bypass mode did not seem to provide any notable reductions in latency or jitter.  I guess yet another way to say this is that knocking their NAT server out of the network did not seem to make much of a difference.  My own NAT server in my own router seemed to be comparable.

(Oh and back when I had my notebook computer plugged straight into the Starlink ethernet adapter, with no customer-provided router in the setup at all, the latency and jitter seemed about the same as well.)

I will provide more comments in future blog posts.


If and when the ethernet adapter arrives

In the previous post I mentioned that some three weeks ago I ordered my installation kit and the ethernet adapter.  And although the installation kit arrived, and I successfully got the service working, the ethernet adapter has even now not gotten shipped.  The supposed shipment date was something like a week ago but even now it has not gotten shipped.

It is perhaps helpful at this point to discuss some of the things that I hope to find out once the ethernet adapter actually shows up.

One of the first things will be to try hooking up the ethernet adapter.  The hookup is physically quite simple.  You unplug the antenna cable from the router and plug it into the ethernet adapter.  That plug is really quite long and thick and I gather from discussion group postings that the plug accounts for nearly the entire form factor of the ethernet adapter housing itself.  Then a cord extends from the ethernet adapter, and it has a plug on the end that is intended to get plugged into the router in the place where the antenna cable was previously plugged in.  Finally, there is an ordinary ethernet jack somewhere on the adapter.

Nowhere in the very limited online documentation is there any hint or suggestion as to whether there is usual the industry-customary ethernet link light which might for example indicate whether there is an ethernet link and whether it is 10M or 100M or gigabit.  Nor any indication whether there is an ethernet activity light.  (If any reader has already received one of these ethernet adapters, maybe you can post a comment to say whether it has an ethernet link light or an ethernet activity light.)

Anyway, what I sort of assume is that what I would find if I plug something in at that ethernet jack is that this would be a LAN port, connected to a DHCP server on the NAT of the router.  By this I mean that if I were to connect this ethernet port to, for example, an ethernet switch, I could then connect a dozen or a hundred ethernet clients and they would all receive DCHP IP addresses.

Elon’s idea of providing user control over this router, by the way, is that the user does not need much control.  It is not possible, for example, for the user to pick the subnet for the NAT.  The subnet is 192.168.1.x and that is all there is to it.   As another example you might have wanted to map MAC addresses to particular IP addresses?  Nope.  You might have wanted to pick which IP addresses are part of the DHCP pool?  Nope.  You might have wanted to pick how long the DHCP leases last?  Nope.  In fact I actually do not know how long the DHCP leases last with the DHCP server in this router.  Maybe they last an hour, maybe they last 24 hours.  Maybe they do not expire.  I guess I will never know.

Anyway, the next thing I expect I will try to do once the ethernet adapter shows up and I get it installed is, I will try to turn on the “bypass mode”.  I sort of assume that this will turn off the wifi in the router.  But I actually don’t know.  The extremely sparse online documentation does not say.  (Do any readers know whether the bypass mode turns off the wifi in the router?  If so, please post a comment below.)

WAN IP address.  Once the bypass mode is turned on, I sort of assume that there will still be a sort of DHCP behavior in the router, and that instead of serving up a NAT LAN IP address, the router will serve up a WAN IP address.  In the Internet discussion groups, people have talked about how maybe the WAN IP address might be a so-called “carrier grade NAT” (“CGNAT”) IP address.  Such an IP address is, unfortunately, by definition not a routable IP address.  People have reported that the CGNAT address they receive is 100 dot something dot something dot something.

Anyway one of the first things I will do is look to see what kind of IP address I get from the ethernet adapter in bypass mode.

IPv6?  In the internet discussion groups, people have reported receiving an IPv6 prefix.  If so, then this would be really good news.  This means that the user is really getting routable IP addresses in the IPv6 address space.  Of course they are not static but at least they are routable.

192.168.100.1?  I was very interested to stumble upon an undocumented feature of the router that comes with the rectangular dish.  It turns out that if you open a web browser on your laptop computer, and browse to the IP address 192.168.100.1, you can visit pretty much the same user interface that you can see when you are using the app on your smart phone.  I have detailed the user interface here.

One of the questions will be, once I go into bypass mode, will I lose the ability to visit the user interface at 192.168.100.1?

I gather from the discussion groups that some users were only able to visit the user interface at 192.168.100.1 by setting up a static route.  I guess I will need to check to see whether I will find it necessary to do this once I am in bypass mode.

Of course it will be interesting to see whether there is any significant difference in latency and jitter with an ethernet connection as compared to a connection using the wifi that is built into the Starlink router.

And a followup question will be whether there is any significant difference in latency and jitter with an ethernet connection in non-bypass mode on the one hand, or bypass mode on the other hand.

The user interface

Here I will detail the various tabs and menus of the router user interface.  This includes the by-now-familiar tabs and submenus:

  • Online or not online.  This tells you whether the antenna has or has not managed to register to a satellite.
  • Visibility.  This brings up the spiffy 3D rendering that tells you whether there have been obstructions blocking the ability of the antenna to maintain connections with satellites.  Hopefully the celestial hemisphere is mostly blue.  If there are patches of red, this indicates places where obstructions happened.
  • Stats.  This shows network statistics, including:
    • Uptime, with a graph showing uptime during the most recent ten minutes.
    • Outages, listing all outages lasting longer than 2 seconds during the last ten hours.
    • Latency, with a graph showing latency during the most recent ten minutes.
    • Usage, showing a blue graph (downstream) and a green graph (upstream) during the last ten minutes.
    • Speedtest, showing separate tests from the router to the network, from the client to the network, and from the client to the router.
  • Connected devices.  This is a report from the DHCP server letting you know which devices have DHCP IP addresses.  For each device it lets you know which connection method was used (wifi 2.4, wifi 5, or ethernet), the IP address, the MAC address, and in the case of wifi, the signal strength.  I guess it looks up the first few bytes of the MAC address to try to work out the manufacturer of the device.  Green means 2.4 and orange means 5.  This report does not, however, tell you how much DHCP lease time remains.
  • Settings.  This includes several sub-settings.
    • Wifi configuration.  This includes fields for renaming the wifi networks, changing the wifi passwords, splitting out the 2.4 and 5 wifis, and turning on WPA3 security.  On my router, none of these fields or settings actually work.  The only way I was able to make any changes to these settings was through tech support.  Lots of things are missing, for example the user does not get to pick the wifi channel or the wifi bandwidth.  The user is not able to choose whether the wifi network is visible or not.
    • Stow Starlink.  In this context, “Starlink” seems to mean “the antenna”.  (I don’t think it means “stow the Starlink corporation”.)  The antenna arrives in its shipping box in a folded-up position.  This button in the user interface instructs the antenna to return to that folded-up position, which is what you would want to do if you ever decide you need to pack up the kit for reshipping.
    • Factory reset.  The button is labeled factory reset which makes you think maybe it would do a factory reset of the entire system.  Nope.  The accompanying text explains that it merely does a reset of the wifi network name and password, and, I guess, by definition, making it so that the 2.4 and 5 networks look like a single wifi network.
    • Advanced.  This provides four buttons:
      • Debug data.  This provides the following details:
        • App
          • this means the user interface app version
        • Router
          • router firmware version
          • router uptime
          • router device ID (a unique ID which in my case is “01” followed by something like twenty zeroes and then five hex characters.
        • Starlink (which I gather means “the antenna”)
          • starlink version (which I gather means antenna firmware version)
          • starlink uptime (which I gather means antenna uptime, which in my case is only a few hours even though the router uptime is several days)
          • starlink device ID (a unique ID which is the letter “u” followed by about twenty zeroes and then five hex characters)
        • Account
          • account name (my name)
          • account account (my account number starting with “ACC”)
      • Wifi debug.  This brings up a new screen which apparently provides very detailed information about the particular wifi network that the mobile app is connected to right now.  So it is telling you about the 5 network or the 2.4 network depending on which one you are connected to at the moment.
      • Reboot wifi.  This is a really stupidly designed button that just runs off and reboots the wifi without asking “are you sure?”
      • Reboot Starlink.  Now that I know that the “reboot wifi” button just runs off and reboots the wifi without asking “are you sure?”, I am scared to push this button.  I am guessing that what it probably does is reboot the router and the antenna, without asking “are you sure?”  In various places in the user interface, they use “Starlink” to sort of mean “the antenna” so I have to assume that here it means “reboot at least the antenna”.
    • Support.  This simply runs off to the “support” FAQs on the Starlink web site.

Here is the inaugural post

Hello Starlink fans!

I will be chronicling my experiences with the Starlink service.  I hope you will find this blog to be interesting.

In about June of 2020 I paid a $99 deposit to get on the waiting list for Starlink service for my location in the mountains of Colorado.

Every now and then I would log in to the Starlink web site to see what it said about when service might become available.  Eventually the web site said that the service in my area might become available in about December of 2021.

click to enlarge

Then toward the end of 2021, an email showed up letting me know that I was invited to pay the $499 to get the Starlink kit.  I was interested to see that the kit that was offered to me was the rectangular kit rather than the round kit.

What are the pros and cons of the two kits?  I gather, from reading various discussions, that if you have the round antenna (“Dishy McFlatface”) then you have the option of not using their router.  You can just connect your own router to the power supply.  But if you do that, the smart phone app won’t work any more.

A drawback of the round antenna is that the hundred-foot cable is permanently attached at the antenna.   So if the cable gets damaged, you have to replace the antenna.

The router that comes with the round antenna has an ethernet port built-in.

So when the kit with the rectangular antenna became available, users set to work to compare the two kits.  One difference is that the antenna cable is 75 feet instead of 100 feet.  Another difference is that you can unplug it at both ends.  That’s much better of course.  That way, if the cable were to get damaged you could replace it and not have to replace the antenna.  It is possible to purchase replacement antenna cables in lengths of 75 feet or 100 feet.

The setup of the router for the rectangular antenna is that the router serves as both the power supply for the antenna and also as the router.  This is different than the situation with the round antenna where the power supply and router are separate boxes.

The router for the rectangular-antenna system is made so that it could be outdoors.  The router for the round-antenna system is not made so that it could be outdoors.

The router for the rectangular-antenna system does not have an ethernet port.  Lots of comments in the discussion groups have been unhappy about this.  If you want an ethernet port, you have to purchase a separate ethernet adapter that costs $20.  I ordered one of these and after more than three weeks it has not yet been shipped.

For me the most interesting and important potential feature is that the router for the rectangular-antenna system has a “bypass mode”.  This is not well documented but I think it eliminates the NAT (network address translation) function in the router and turns off the wifi in the router.  The idea would be that you could then use your own router and do your own wifi (if you want wifi).

The physical hookup is that you unplug the antenna cable from the router.  You plug that cable into a jack on the ethernet adapter.  The ethernet adapter has a short cord and plug that plugs into the router in the place where the antenna cable was previously plugged in.  If you then just plug in an ethernet cable into the ethernet adapter, I imagine you can get ordinary NAT-type ethernet connectivity to the LAN side of the router.  Or you can turn on “bypass mode” using the smart phone app.  As I say, I gather that if you do that, the NAT gets turned off and (they are not very clear about this) maybe the wifi gets turned off as well.

At this point I assume what happens is that whatever device is plugged into the ethernet adapter will receive one IP address by means of DHCP, and that IP address will be the WAN IP address received by the router from the Starlink network.

What kind of IP address will this be, you might wonder?  Of course what one hopes is that this would be a routable IP address.  Starlink makes clear that you can’t get a static IP address.  But will it at least be a routable IP address?  Right now I don’t know the answer.  From discussions around the internet I get the impression that the answer is “no”.  Apparently Starlink is doing “carrier-grade NAT”.  My impression is that “carrier-grade NAT” does not really mean anything other than “NAT that you are stuck with because the carrier does not want to go to the trouble to give you a routable IP address”.

The next question of course is whether you are going to be able to get IPv6?  And I think the answer, at least with the rectangular-antenna service, is “yes”.

So the kit arrived at the end of December.  I got everything installed.  It works.

There is a switch in the smart phone app that would supposedly permit you to separate the 2.4 gHz wifi network from the 5gHz wifi network.  This would permit them to have distinct network names and distinct passwords.  But I tried and tried and the app never was able to make this happen.  I opened a trouble ticket.  Eventually a tech support person called.  She explained that this part of the app does not work right.  But she can split the network at her end, remotely.  She can set the system names and passwords at her end, remotely.  I don’t like this at all and I told her so.  What if later I decide I need to update the passwords, will I have to open another ticket and wait some days for another phone call?  She said unfortunately yes.

So at this point I am waiting and waiting for them to ship the ethernet adapter.